


Mounting a mailbox: Height, mounting types, distance & tips
A well-mounted mailbox is easy to reach, opens securely and can be used reliably. The right height, a load-bearing substrate and sufficient space at the entrance are decisive. Plan the location and fastening this way — from the wall-mounted mailbox to the freestanding system.

First plan the daily use: delivery must be possible without someone having to ring the bell. You should be able to reach the lock and remove the post without stretching or bending deeply. Then check door movement, fixation and weather protection. Only when these points fit together should the drilling holes be determined.
The correct height for the mailbox
An insertion opening at a height between 70 and 170 cm above the ground serves as an ergonomic guide. This range refers to the insertion opening, not to the top edge of the housing. It does not replace planning for barrier-free operation. How insertion height, lock axis and other requirements interrelate is explained in our guide to DIN EN 13724.
When selecting a product, pay attention to the information regarding DIN EN 13724. Choose a mounting position that suits the users and the design. On a model with a top insertion, the insertion opening and lock are arranged differently than on a unit with a front flap. Therefore hold a scale template against the wall and test both grips.
| What is planned? | Key considerations |
|---|---|
| Insertion opening | Delivery-friendly height and space to push the post completely in. |
| Lock and removal door | Comfortable handle height and access to the lower part of the compartment. |
| Doorbell and other control panels | Consider their own operating height; do not simply align them with the top edge of the housing. |
| Finished floor | Measure heights from the eventual finished surface, including paving or slabs. |
For multiple stacked compartments, check the lowest and the highest row. A wider arrangement with fewer rows can improve reachability. The appropriate layout should therefore already be considered when selecting the mailbox system.
Barrier-free mounting of the mailbox
A suitable insertion height alone does not make a mailbox barrier-free. What matters is whether the intended users can reach the location, operate the lock and remove the contents. This also applies when seated and with limited hand mobility.
The national guide for barrier-free building specifies a reach and operating height of 85 cm for controls according to DIN 18040-1; for multiple controls arranged vertically 85 to 105 cm are provided. For wheelchair users it describes manoeuvring areas of 150 × 150 cm or 150 × 120 cm without a change of direction. These values are a planning reference for control elements, not a blanket height approval for every mailbox type. To the official planning guide.
- Provide access without steps or obstructive thresholds.
- Keep the approach and operating area clear of bicycles, planters and door leaves.
- Test the lock, handle and compartment interior from the intended user position.
- Plan clearly recognisable signage and glare-free lighting.
Which requirements apply to a specific residential building or a publicly accessible area must be clarified in project planning. Lateral reachability and the depth of the mailbox compartment should also be checked in this assessment.
Mounting the mailbox next to the front door
The area beside the front door is practical: you can take the post directly on your way into the house. The position is suitable if the mailbox remains accessible from outside and is not located behind a locked gate. For a long property access path, a location nearer to the public way can make delivery easier.
Whether left or right is more favourable depends on the actual entrance situation. Open the front door fully and also consider the door handle, door stop, bell, exterior light and any side panels. Also think about the moment when one person empties the mailbox and a second person wishes to pass through the door.
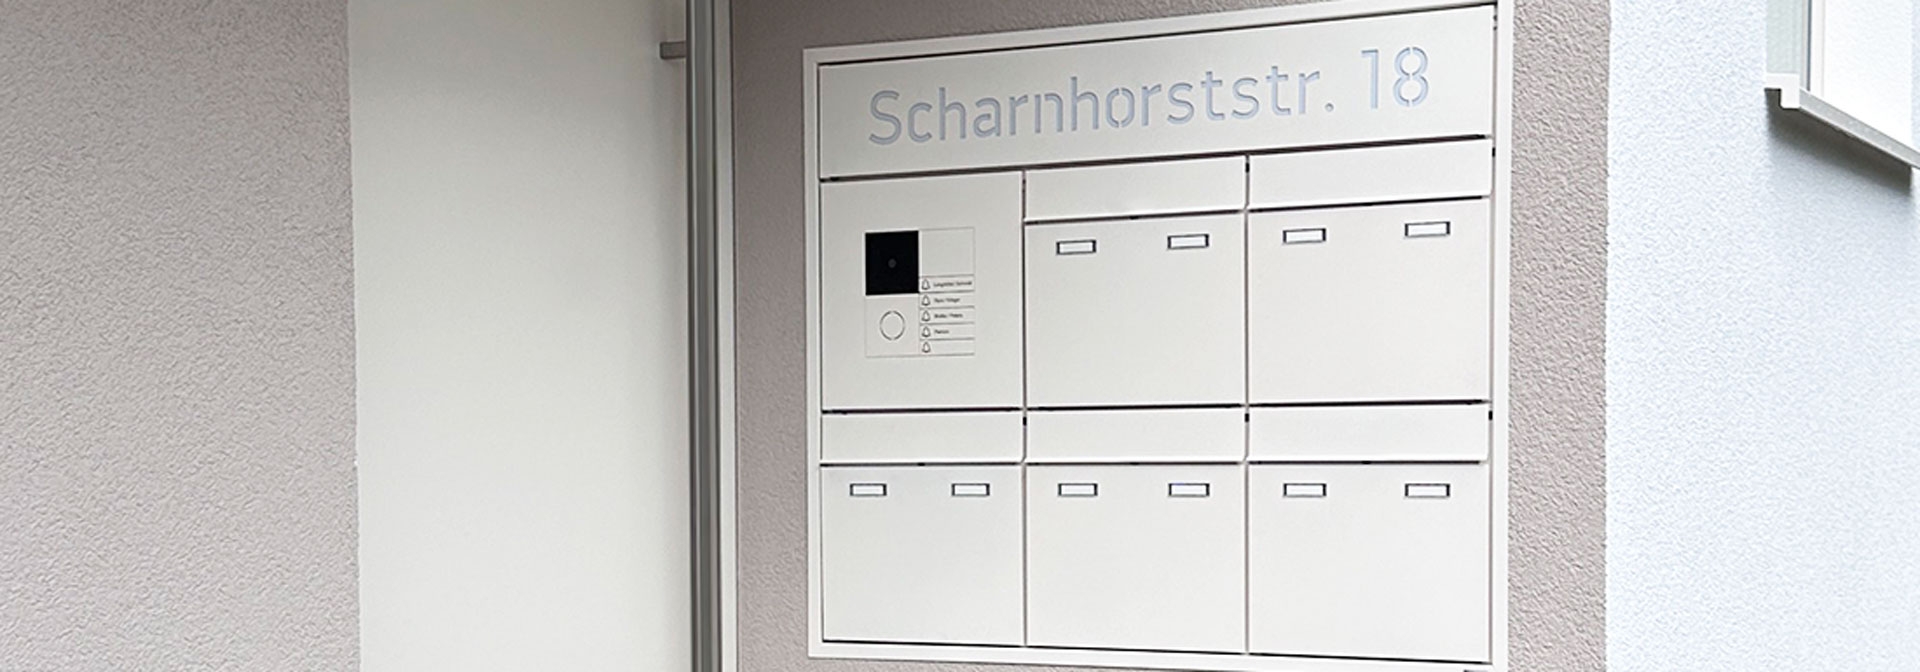
How much distance from the front door?
The appropriate distance is determined by door movement, mailbox depth and operating space. A single centimetre value would not be a reliable mounting recommendation without these details. Check four different clearances:
Distance to the open front door
The door leaf and handle must not touch the mailbox at the intended door opening. Consider the entire swing area and the actual stop.
Space in front of the mailbox
The removal door must be able to open sufficiently. Even with an open flap the post should be reachable without unnecessarily narrowing the passage.
Distance to wall edges
Drill points require the edge and axis clearances specified by the fastening system. The visible housing edge does not indicate the required distance for the anchors.
Space to other building elements
Downpipes, lights, doorbells and window sills must not obstruct insertion or removal. Allow space for later cleaning and maintenance as well.
Practical tip: Place a box with the outer dimensions of the mailbox at the planned position. This simple test reveals conflicts that a flat drawing can easily overlook.
The most important mounting types compared
A wall-mounted mailbox does not necessarily have to be on the façade. In addition to surface-mounted installation, integrated and freestanding solutions are also possible. Choose the form according to the wall, access route and desired side for removal.
| Mounting type | Suitable for | Planning considerations |
|---|---|---|
| Surface-mounted mailbox | Mounting on an existing wall | Substrate, fixing points, façade construction and housing depth. |
| Recessed mailbox | Integration into a suitable wall niche | Installation housing, cut-out, sealing and thermal bridges must be professionally planned. |
| Through-the-wall mailbox | Insertion from the front and removal from the rear | Wall thickness, through-opening dimensions and free space on both sides. |
| Mailbox column or plinth | A standalone location at the access | Foundation, anchoring, conduits and finished ground level. |
| Fence mailbox | Integration at the property boundary | Load-bearing capacity of the fence, suitable brackets and removal direction. |
For a new build it is worth deciding early: wall openings, foundations and conduit routing can then be prepared together with the other work. For retrofitting the existing substrate often dictates the most economical solution.
Correctly fixing a wall-mounted mailbox
The following sequence supports planning a surface-mounted installation. The instructions of the specific mailbox and the requirements of the fastening system remain decisive. A mounting rail, for example, has other reference points than a direct screw fixing through the rear panel.
Prepare: mounting drawing or template, tape measure, spirit level, marking pen, suitable cable detector, appropriate drilling and screwing tools and the coordinated fasteners. Heavy systems are installed with suitable assistance.

Clarify whether the wall is made of concrete, solid brick, perforated block or another material. Check existing plans and the drill points for hidden electrical, water or other services. If in doubt, have the location professionally checked before drilling.
Consider the building material, self-weight, load and mounting distance. Drill diameter, anchoring depth and edge distances depend on the chosen system. Supplied plugs are not automatically suitable for every wall.
Set the height from the finished floor. Transfer the actual hole pattern or the drilling template and check the markings with the spirit level. Dimension details from a different model must not be adopted.
Use the drilling method intended for the substrate and fastening. Clean the drill holes according to the mounting instructions and insert the fasteners as described.
Install the intended spacers and sealing elements in the correct order. Hold the housing without tension and check the alignment before the connections are finally tightened.
Tighten the connections according to the respective specifications. The fastening should hold securely without deforming the rear panel or housing. Irregularities are compensated with suitable system parts.
Check the insertion flap, removal door and lock several times. Test removal with a large item and also open the front door. Finally remove protective films and drill dust according to the care instructions.
Special case: Mailbox on an insulated façade
For an external thermal insulation composite system the fastening must fit the entire façade construction. Plan it according to load, insulation thickness and load-bearing substrate; an ordinary plug in the render is not universally suitable. Thermally-separated spacer mounting systems are available for such applications. The sealing of penetrations must also match the façade system. Fixing solutions for ETICS at fischer.
Aligning the mailbox straight
Refer to a fixed housing edge or the mounting rail. A movable insertion flap is not suitable as the sole measuring surface. Check horizontal and vertical alignment; old mortar joints or paving edges can be skewed and are not reliable references.
Check again after tightening. If the removal door rubs or the lock only closes under pressure, first check whether the mounting is stressing the housing. Do not force the unit with extra torque against an uneven façade. A neat compensation preserves shape and function.

Mounting freestanding mailboxes and systems
A freestanding system requires a permanently load-bearing substructure. Whether cast-in posts or base plates are provided depends on the model. Individual loose paving slabs do not replace a professionally planned foundation.
Foundation dimensions, founding depth and anchoring depend, among other things, on the system, soil, frost conditions and loads. Therefore use the mounting and foundation plan of the specific product. Also consider the eventual paving height and sufficient space in front of the removal side.
Conduits for lighting or door communication are planned before concreting. Electrical connections should be carried out by qualified personnel. Do not load the system until the conditions required for the concrete and fastening system are met.
View mailbox columns and plinthsWhat is important in rain and bad weather?
A location with as much protection as possible helps reduce direct irrigation and driving rain. A canopy can be useful as long as water does not drip from its edge onto the mailbox. Also consider the prevailing weather side, splash water from the ground and neighbouring irrigation systems.
Flaps must be able to close
Choose sufficient volume and empty the box regularly. Protruding items keep the insertion open and can lead moisture into the compartment.
Maintain water drainage
Intended drains and constructive openings must not be accidentally closed. Seal connections only as the mounting instructions and installation situation specify.
After heavy rain check whether flaps move freely and whether moisture collects in the compartment. Stainless steel and coated surfaces also require appropriate care. Clean according to the manufacturer's instructions; aggressive agents and hard scouring pads can damage surfaces.
Combining mailbox and house number
An integrated house number combines signage and mail reception on one surface. Alternatively a separate sign can be designed to match the mailbox. Matching surfaces, typefaces and colours create a calm overall appearance.
Check readability from the access path — also with the front door open and at dusk. A small number directly at the entrance can be hard to read from a greater distance. Choose size, contrast and lighting suitable for the location and take local regulations on house numbering into account.
Plan house number, name plate and doorbell together without sacrificing the comfortable operating height of the mailbox.
Discover suitable house numbers
Checklist for mounting the mailbox
- Is the location accessible from the outside and practical for everyday use?
- Are insertion, lock and compartment interior at a reachable height?
- Have the finished floor height and, if applicable, barrier-free use been considered?
- Can the front door and the mailbox door move fully as intended?
- Have wall construction, cable routing and suitable fastenings been clarified?
- Have the original hole pattern and required edge distances been checked?
- Have weather protection, signage and, if applicable, cable supply been planned?
- Is the mounting instruction for the specific model available?
For communal systems an additional plan with compartment assignment and labelling is worthwhile. Agree changes to communal or rented façades with the responsible parties in advance.
Questions and answers about mailbox mounting
At what height should a mailbox be mounted?
For the insertion opening 70 to 170 cm above the ground serve as an ergonomic guide. Additionally plan the lock and removal so that the intended users can reach them comfortably. The reference point is the finished standing surface.
Is a mailbox at 85 cm automatically barrier-free?
No. Operating height is only part of the planning. A step-free approach, manoeuvring area, reachability of the compartment interior and easy operation must also fit. The specific requirements depend on the building and use.
How much distance must remain between mailbox and front door?
Plan the distance based on the door movement, the door handle, the mailbox depth and the removal door. All parts must be able to move as intended and access must remain usable. Additionally the edge distances of the fastening system apply.
Should the mailbox sit to the left or right of the front door?
Decisive factors are the door hinge, approach path, lighting and available space. Choose the side where delivery and removal work well and no door leaf or other component obstructs the mailbox.
Which plugs do I need for a wall-mounted mailbox?
That depends on building material, façade construction, load and mounting type. Choose the fastening system according to the product and mounting guidelines. A universal plug size is not equally suitable for concrete, perforated block and insulated façades.
Can I fix a mailbox to an insulated façade?
Yes, with a mounting system appropriate to the façade and the load. Insulation thickness, load-bearing substrate, thermal bridges and sealing must be taken into account. The selection should be professionally checked if the wall structure is unclear.
Can I glue the mailbox on without drilling?
Only if the manufacturer and the fastening system explicitly allow this mounting for the specific product, substrate and load. Ordinary mounting adhesive tape is not a universal substitute for an intended screw fixing.
Does a freestanding mailbox need a foundation?
It requires a load-bearing substructure suitable for the model. Execution and anchoring depend on the mounting plan, location and ground conditions. Loose paving slabs do not replace a professionally planned foundation.
How do I protect my post from rain?
Choose a location with as much protection as possible and sufficient compartment volume. The insertion flap must be able to close completely. Regular emptying, free water drains and correctly executed connections support weather protection.
What should I check after mounting?
Check firm seating, straight alignment, lock, insertion flap and removal door. Test access also with the front door open. After severe weather events a visual inspection and care according to the manufacturer's instructions are advisable.
Finding the right mailbox for your entrance
First choose the mounting type and then the compartment layout, surface and fittings. Photos of the location, the finished floor height and details of the wall construction help with further planning. The product-specific mounting instructions provide the dimensions for implementation.
